Enabling Lighting and Vision on a Map
Open your map
Click on the Unlock Map button at the top right of the screen. This unlocks the Image Control.
Turn on lighting and vision by clicking on the button that says Enable Lighting and Vision
Adding Lights to a Map
Any map can have one or more types of lights added.
Ambient Lighting
There is ambient lighting that represents natural light or outdoor light. This type of lighting will illuminate any part of the map which is not masked off. Walls, terrain, and shadow casters will all cast shadows based on the direction and length of shadows defined for the map. You can adjust the color of the light, color of the shadows, direction of the light and length of the shadows. You can even turn off shadows if you just want to illuminate a map. This may be best where shadows are already drawn on an existing map.
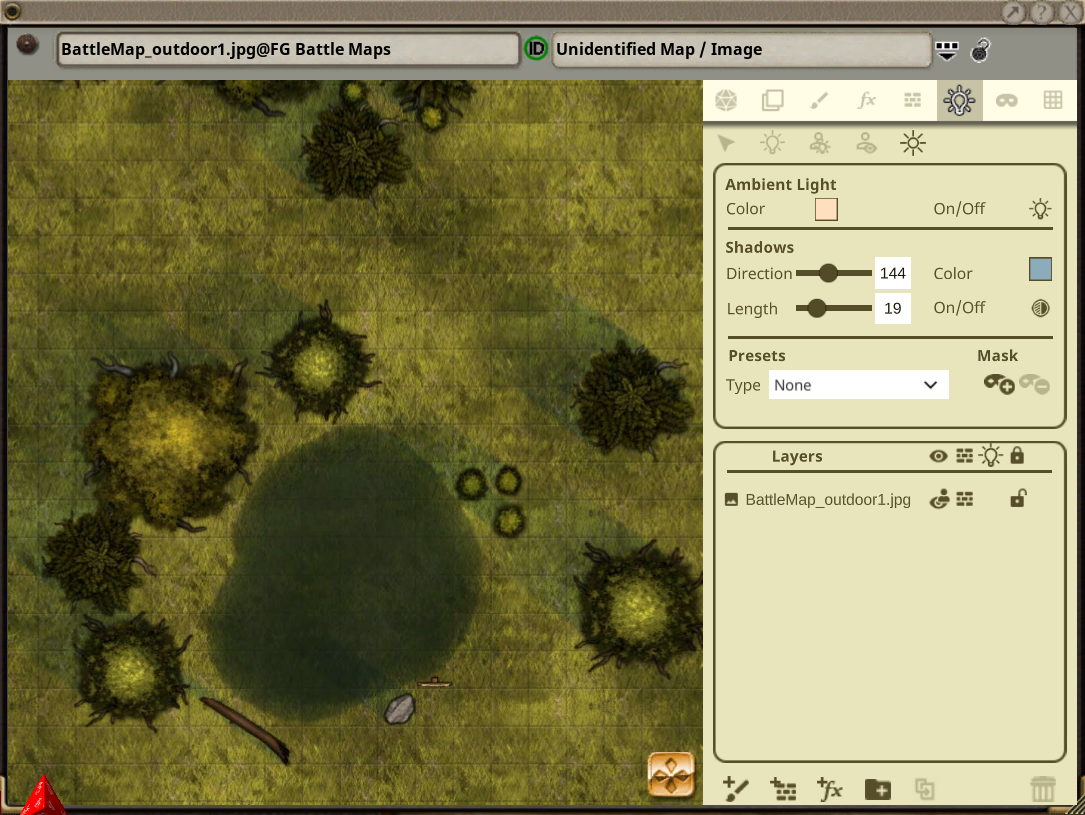
To Add Ambient Lighting:
Enable Lighting and Vision
Navigate to the Lighting Mode on your Image Control
The Lighting Mode toolbar reveals a second layer of toolbar options. Click on the option for Ambient Lighting on the far right.
Select from one of the built-in preset values to choose settings which work well for Dawn, Dusk, Sunlight, or Moonlight.
Adjust values as desired

Limit Where Ambient Lighting is Applied
If you have a mix of indoor and outdoor areas, you may want to mask the indoor spaces from ambient lighting so that only the outdoor areas receive lighting and shadows from the Sun.
Return to your Ambient Lighting toolbar
Click on Add Mask at the bottom right of the toolbar
There are two modes available: hide area and reveal area
Click on hide area and then drag rectangles on the map to mask off those areas. These areas will not receive any light or shadows from ambient lighting.
To mask an area that is not rectangular, you can hold down ALT while you click and drag.
You can switch back and forth from hide area and reveal area to complete your ambient light mask.
See video walkthroughs below
Adjusting Colors
Light and shadow colors can be assigned by using the color picker. You can pick the color, use the sliders for Red/Green/Blue/Alpha, or paste in an RGB or ARGB value. The Alpha slider sets the opacity/transparency of the color.
Add Lights to a Map
Regular lights can set a distance for bright light and dim light, along with a falloff amount that describes how sharp the edge will be as it transitions from each state: bright, dim, no light. You can also adjust the color of the light, the opacity, and an effect (flicker, pulse, flash).
To Add Lights:
Enable Lighting and Vision
Navigate to the Lighting Mode on your Image Control
The Lighting Mode toolbar reveals a second layer of toolbar options. Click on the option for Lights.
Select from one of the built-in preset values to choose settings which work well for Torches, Candles, or Lanterns.
Adjust values as desired
See video walkthroughs below
Lighting is Additive
Multiple light sources in the same area will add together. If you have ambient lighting already and then you add dim light, Fantasy Grounds will adds these together and the result will likely be bright light. If a player or NPC token is using a light source, this will add to any light or ambient light already present in an area.
Add a Light Source to a Token
Both player tokens and NPC tokens can carry around their own light source. As the token moves, so will the light. Tokens can have multiple light sources attached, although remember that light sources are additive.
Add a Token Light from the Image Control
This method allows the GM to add or remove a light source from a token.
Enable Lighting and Vision
Navigate to the Lighting Mode on your Image Control
The Lighting Mode toolbar reveals a second layer of toolbar options. Click on the option for Token Lights.
Select the token(s) you want to add the light to
Select from one of the built-in preset values to choose settings which work well for Torches, Candles, or Lanterns
Adjust values as desired and then click on the Add Light button
To remove it, click on Remove Light
Which Method to Use?
This method works in every ruleset. Token lights added this way, however, must be re-applied every time the player token is added to a new map. See the section below for the recommended way to add token lights to players wherever the ruleset supports it.
Adding a Token Light Using an Effect (Recommended)
Using an effect is the recommended way to add and remove lights. This is supported in a subset of rulesets built upon our CoreRPG ruleset. In version 4.1, this applies to CoreRPG, D&D 5E, D&D 4E, D&D 3.5E, Pathfinder, Pathfinder 2E, SFRPG, DCC, Castles & Crusades, d20 Modern. This enables your players to apply their own lighting as long as they add the effect. It also allows a Player token to remember the setting if they move from one map to another.
Prerequisites:
The player or NPC must be in the Combat Tracker and then the token has been dragged from the Combat Tracker to your map
You will need to add a Custom Effect to the Effects window to re-use it (or have an action defined on your individual character sheets)
Supported Light Effects Syntax and Examples:
Syntax:
LIGHT: {range} {type or color in ARGB} {special Fx} {Fx frequency}
LIGHT: {range} {preset name}

Examples:
LIGHT: 5 candle
LIGHT: 20 torch
LIGHT: 30 lantern
LIGHT: 20 FFFF0000 pulse 25
Optional Parameters
Range is optional and is supplied in the units defined for the ruleset. If left off, the range will be unlimited. The examples above work for D&D fifth edition.
Special Fx is optional. If absent, no effect will be applied.
Fx frequency should be a value from 1 to 100. 1 is minimum and 100 is maximum.
Video Walkthroughs
Earlier videos may contain features that have changed either visually or in function since the video was created. This is due to Fantasy Grounds Unity being in active development during filming.
For example: the Sidebar may now look different. More information about that here:
Link: https://fantasygroundsunity.atlassian.net/wiki/spaces/FGCP/pages/1242857473/The+Sidebar%3A+Changing+Play+Modes?search_id=40cb1604-83fd-4aca-b25c-850be417f1f2
Basic Usage
Adding a Mix of Ambient Light and Normal Lights
Advanced Lighting Options